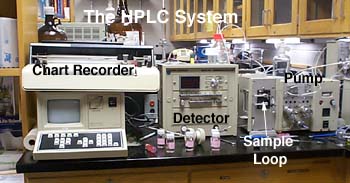
Using the Waters HPLC
Several steps are required to start up the HPLC. First, the solvent needs to be prepared, the pump needs to be started and run for some time before use, and finally the absorbance detector and chart recorder need to be prepared.
Preparing the Solvent
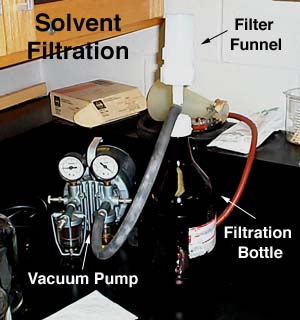
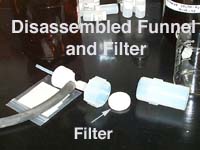
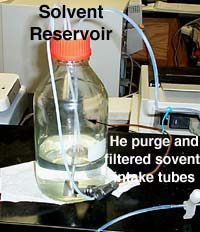
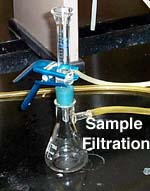
Solvent for use in HPLC must be clean and degassed. Use of HPLC-grade solvents helps, but they still must be filtered first. To filter the solvent, place a disk of the appropriate filtering media (ask your instructor) in the filtering funnel and screw the funnel onto the filtration bottle. Turn on the vacuum pump and pull all of the solvent through the filtration media. Don't pull a high vacuum on the bottle (10 psi is plenty). Transfer the solvent to the solvent reservoir bottle. Place the filtered solvent intake tube and the He purging tube into the solvent and purge with He for 30 min.
Starting the Pump
| After the solvent has been deaerated with He, the pump can be turned on. If the pump has not been primed, ask your instructor to prime it. With the flow rate set to 0.0 mL/min, make sure the pressure limit is set to 4,000 psi, and turn on the power. Increase the flow rate to 1.0 mL/min and allow solvent to flow through the column for 30 min. | 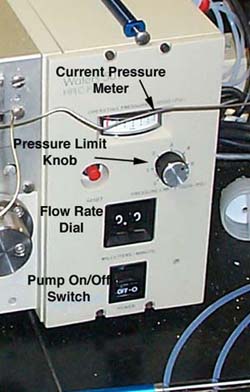 |
Setting up the Chart Recorder and Absorbance Detector
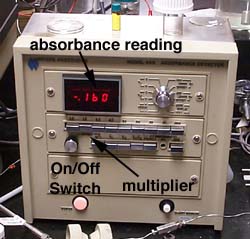
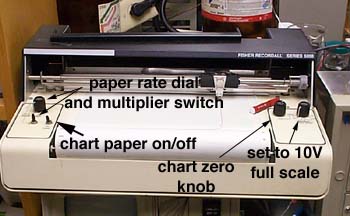
The chart recorder should be set so that 10 V is full scale. Turn on the absorbance detector and zero the absorbance reading. The multiplier on the absorbance detector should be set to 1.0. The pen should be near the right-hand side of the scale on the chart recorder. If not, set it there with the Zero knob. Set the rate of paper movement to an appropriate amount using the rate knob and multiplier switch on the left hand side of the chart recorder. Make sure there is a pen in the recorder. You can raise and lower the pen off the paper using the lever on the far left hand side of the pen carriage. Start paper movement using the Chart On/Off switch.
Injecting a Sample
Before injecting a sample, it also needs to be filtered. A smaller (10 mL) funnel is available that can be connected to an aspirator to filter the sample. As with the mobile phase filter, removable filter disks are used for this frit.
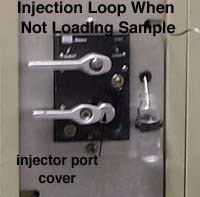
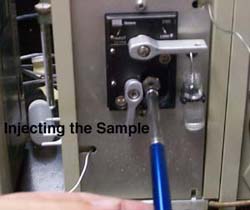
The Waters sample loop is a little tricky to use. To the left of the pump (and attached to it) is the injection loop. To inject a sample, the top lever needs to be moved from the inject to the load position (move from left to right). Then the lower lever needs to be moved down 90 degrees into a vertical position. This allows the injection port cover to be removed. Remove the cover by pulling it straight out (this will require some force, but pull it out slowly). Pull 300 microliters of solvent into a syringe and inject into the injection port. Excess solvent should come out of the overflow tube. Remove the syringe, replace the port cover, return the lower lever to a horizontal position, and then move the load lever to the inject position. When moved to the inject position, a sharp peak should appear on the chart recorder to mark the injection.
Shutting Down the Machine
Allow the solvent to flow through the machine for 20 minutes after all of your injections have completed. Set the flow rate to 0.0 and turn off the pump. You may now Turn off the detector and the chart recorder's Chart On/Off switch. Turn off the He flow at the He tank.
This tutorial was created by Michael R. Jordan at Oklahoma Baptist University. Reproduction by printing or photocopying for instructional use by educational institutions is allowed.