Using the Potentiostat
The Cypress Systems Potentiostat is controlled by the PC via the CS-1200 software. Before using the software, the sample and electrodes must be prepared.
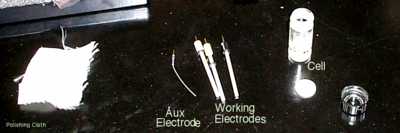
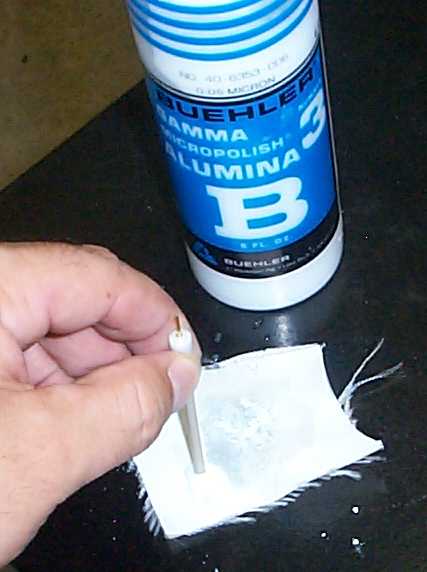
There are three electrodes that will be used. The first electrode is the auxillary electrode, and is a piece of Pt wire. Clean the auxilliary electrode by wiping it off with a Kimwipe moistened with acetone. The next electrode is the working electrode. We have three working electrodes; gold, platinum, and glassy carbon. Select the appropriate working electrode (usually Pt) and prepared to polish it. Obtain a piece of polishing cloth and place a drop of the Alumina polish on it. place the electrode in the center of the Alumina and polish it in a figure 8 pattern on the cloth. Wipe off the electrode with a Kimwipe. The surface should be shiny. The reference electrode (the third electrode) is a Ag/AgCl electrode that is kept in a saturated KCl solution. After removing it from the KCl, rinse it with distilled water and wipe it dry with a Kimwipe. This will prevent signal from Cl- oxidation.
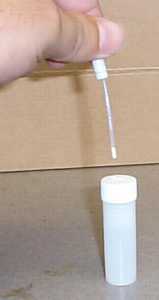
The samples are prepared in a 3 mL conical vial (shown below). An electrolyte must be placed in the solvent to make the solution conductive. Place ~50 mg of TBAPF6 into the vial. This electrolyte is stored in a dessicator to prevent water from getting in the solution. It was recrystallized from ethylacetate/pentane. Do not use TBAPF6 straight from the bottle even if it was first dried. Obtain dried, distilled CH3CN from your instructor. Syringe in ~2 mL of solvent. Now add a small amount of sample (~10 mg, a spatula tipfull) into the solution.
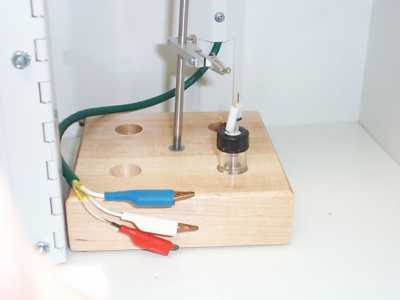
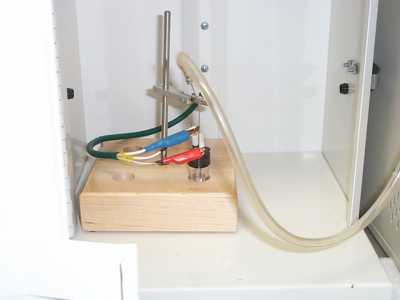
Place the lid with holes for the electrodes on the vial and screw it on. Place the electrodes through the holes and and place the vial in the Faraday cage. Attach the aligator clips to the appropriate electrodes (they are labelled, 'WKG' = working, 'REF'=reference, and 'AUX'=auxilliary). Place the small tube from the argon cylinder into the solution through one of the holes in the lid of the vial. Allow the argon to bubble through until all of the electrolyte and sample dissolve.
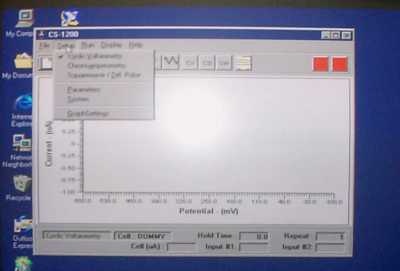
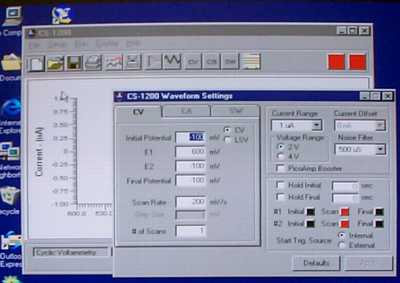
Start the CS-1200 software from the shortcut on the desktop. From the Setup menu, select Cyclic Voltammetry for the technique. Choose Parameters from the setrup menu to enter the parameters. You need to enter the Initial Potential, the second potential (E1), and the final potential (in both E2 and Final Potential). Usually the initial potential and final potential will be the same. If you are planning on oxidizing the sample, it is best to start at a reducing potential (negative) and move to an oxidizing potential (positive). If you plan on reducing the sample, do the opposite. Set the Scan Rate at 100 mV/s or less. The number of cycles should be 1 to begin with. Set the current range to 10 µA to begin with. Click on the Hold Initial potential box and enter 3 s (this will give you a better baseline).
Before you scan, pull the Ar line out of the solution (but not out of the vial). It should blow Ar over the top of the solution to create an "Ar blanket". Choose Run from the Run menu. You should see your signal. If not, you may need to change the voltage range (you may be looking in the wrong place) or the current range (your gain is set too low).
For square wave of differential pulse voltammetry, you only need to specify the inital potential, final potential, and current range. Do not change the other settings.
Remember to save your voltammograms and print them.
When you are finished, shut down the computer and turn off the potenitostat at the power strip. Turn off the Ar at the cylinder and clean all the electrodes and the cell. Remember to place the reference electrode in the saturated KCl.
This tutorial was created by Michael R. Jordan at Oklahoma Baptist University. Reproduction by printing or photocopying for instructional use by educational institutions is allowed.